Showing posts with label recipes. Show all posts

Friday, August 10, 2012

quinoa chicken salad


One of my favorite summer dishes is Quinoa Chicken Salad.  It is probably the most versatile thing I serve to my family: it can be hot or cold, and one can easily change up the meat, vegetables, even the dressing.  It all depends how you like it and what you have on hand.  I doubt I've ever made it precisely the same way twice.  All the same, here is a rough blueprint of what I do when I prepare this "recipe."

The idea of this dish was inspired primarily by The Nourishing Gourmet's Everyday Italian Rice Salad.  I use the dressing from that recipe, although I'm halving it here in this context.

Ingredients
1 c. quinoa, uncooked
2 c. Water
2 T. raw vinegar or lemon juice
---------------------------
2 c. water or bone broth
1 c. cooked chicken, shredded
2 hard-boiled eggs, chopped
1 c. raw cheddar cheese, cubed
1/2 c. Peas
1/2 c. Carrots, shredded
1/2 c. Green onions, sliced

Dressing: 1/3 c. Extra virgin olive oil
2 T. Raw apple cider vinegar
3/4 t. dried basil
1/2 T. Dijon mustard
1 garlic clove, minced
1/2 t. sea salt
dash of black pepper


Make the salad
The night before, combine the first three ingredients and let rest overnight.  (This helps neutralize the anti-nutrients found in quinoa and other seeds, as well as nuts and whole grains.  For a superb chart on soaking and cooking grains properly, click HERE.)

The following day, rinse quinoa well and place in a medium pot.  Add 2 c. bone broth or water.  I also add a dash of salt and a dash of extra virgin olive oil at this point.  Bring to a boil, then reduce heat, cover and cook 25-30 minutes.  When the quinoa is done cooking, remove from heat but leave covered for 15 additional minutes.  At this time, uncover & fluff with a fork.

Add mix-ins to the quinoa.  Prepare dressing and pour over the other ingredients, combining well.   Enjoy!

We love this salad hot, but it really shines as a cold main dish on hot summer nights.  As I said, feel free to play with the meats, vegetables, cheese, etc.  You could even go with an entirely different dressing: the possibilities are endless!


Monday, July 2, 2012

peanut butter "syrup"


This isn't a true syrup, but it doubles nicely as one.   I developed this idea a few months ago, and it has been a tremendous hit around here.  Use this sweet topping on pancakes, waffles, or even ice cream.  The possibilities are endless!  It is especially spectacular with chocolate chip pancakes - trust me on this one.  

Now...I don't have exact amounts for this recipe.  Instead, I just mix, stir, add, etc. until it looks about right.  So I do apologize: those kinds of recipes drive me batty!  But so much about this mixture depends on temperature (both of the room and of the materials) and consistency that it's really best to see what works in your own kitchen on a particular day. 


Peanut Butter "Syrup"
coconut oil (very soft) - about 1/4 cup
creamy organic peanut butter - about 2-3 Tablespoons
sea salt (if your PB doesn't already contain salt) - a dash
raw honey - about 1 Tablespoon
vanilla - a dash

Combine all the ingredients and stir until smooth.  If your coconut oil was on the firm side, you may wish to warm the mixture until it reaches a pourable consistency.  If the mixture is too runny, add more peanut butter and stir again.

I store this in the refrigerator, but do keep in mind that coconut oil becomes very hard when cold.  If you want to use it at breakfast, pull it out the night before and leave at room temperature.   Or reheat gently in a toaster oven.  You get the idea: give it some love.  It needs to be fairly warm (room temperature in the summer) in order to be spreadable.

Although it could be yummy by the spoonful as well.  I wouldn't know a thing about that. Not. A. Thing.

Enjoy!


Wednesday, June 27, 2012

using summer strawberries


Here in the Pacific northwest, it is strawberry time!  Oregonians are proud of their berries, particularly the petite, oh-so-sweet Hood variety.  In this town and in my home there is much rejoicing when the strawberries "come in."  We've been enjoying our first flat of strawberries very much, and in light of that I thought I'd share my favorite ways to use these stunning little gems - aside from simply eating them, that is!


Popsicles
1 cup berries
1 banana
1 cup whole plain yogurt OR kefir
1/2 cup raw honey

Blend well to combine, pour into molds and freeze.  Enjoy on a warm summer afternoon!


Smoothies
Here's my little secret: to make smoothies, I simply mix up the popsicle recipe above.  Pour into cups and serve.  Easy and convenient if you don't have time to wait.

Shh...don't tell my kids.


Jam
One of the most versatile ways to use summer strawberries is in freezer jam.  For several years now, I've been using this recipe from Kimi at The Nourishing Gourmet.  Using a product called Pomona's Pectin, it's happily possible to use only honey to sweeten your jam!  Long time readers of this blog will know that I really dig honey-sweetened stuff.  My family loves having a stash of freezer jam in supply; it's so refreshing to have that taste of summer all year long.


Kombucha
I mentioned in my post on How To Make Kombucha, I mentioned that I often flavor our kombucha (during a second ferment) with fruit.  During the summer -and while our supply of frozen fruit holds out- I use berries.  My very favorite berry for kombucha?  Strawberry.  So sweet, yet tangy and fizzy...and bright red. It doesn't get much more festive than that, if you ask me.


There you have it, my favorite ways to use summer strawberries.  Of course, the possibilities are pretty much endless, but that's how we do it at my house.  Happy end of June to you!

Thursday, June 21, 2012

real food s'mores

Real food s'mores.
You thought it wasn't possible?  You were afraid to hope?


I'm here today to tell you, dreams do come true.  There is such a thing as real food s'mores.  They are such a fun summer treat, eaten around a fire pit or a campfire.  Gooey, warm, sweet, crunchy, delicious.  And it's possible to enjoy this wonderful thing without GMOs or the dreaded high fructose corn syrup.  Interested?  I thought so.

Your basic s'more has three key ingredients: graham crackers, chocolate, and marshmallows.


For graham crackers, I used New Morning graham crackers. They were purchased at a local health food store.  The ingredient list isn't perfect, but it's really pretty good.  Or if you've got the time and ambition, you could try making your own graham crackers!  Try this delicious whole wheat recipe (I would use sprouted flour) from Wardeh at GNOWFGLINS, or this grain-free recipe from Jami at Eat Nourishing.

Let's talk chocolate.  It's always possible to make your own honey-sweetened bars, but my go-to brand is Rapunzel.  This is the company which produces the unrefined natural sweetener Rapadura (now labeled "Organic Whole Cane Sugar").  I love, love, love their chocolate bars.  I've only found one local store that carries them (New Seasons, if you're in the Portland area!), but they're also available from Azure Standard as well as online.

Last but not least, the quintessential ingredient for s'mores:  roasted marshmallows.  I've found a brand in the health food store which had ...reasonably respectable ingredients.  I wasn't thrilled with them, but I would have given them a try - except that all I could find were mini-marshallows.  Not so good when it comes to roasting.  So I was thrilled when one of my favorite bloggers posted a recipe for Fluffy Honey Sweetened Homemade Marshmallows.  I was a bit nervous to try them, but was surprised by how quickly and easily I whipped up a batch.  And yes, they do roast.  You have to watch them, because once they reach a certain temperature they'll go all gooey, but they do roast.  What's more, this recipe has stellar ingredients.  And honestly?  They're delicious.  My kids loved them, and I thought they tasted truly tasted like marshmallows.  Only better.


You roast a 'mallow, slap them all together, making a nice little chocolate & marshmallow sandwich with a crunch graham exterior, and voila!  So yes, it is absolutely possible, and I couldn't be more pleased to tell you.

Real food s'mores!  Who would have thought it?


Friday, June 15, 2012

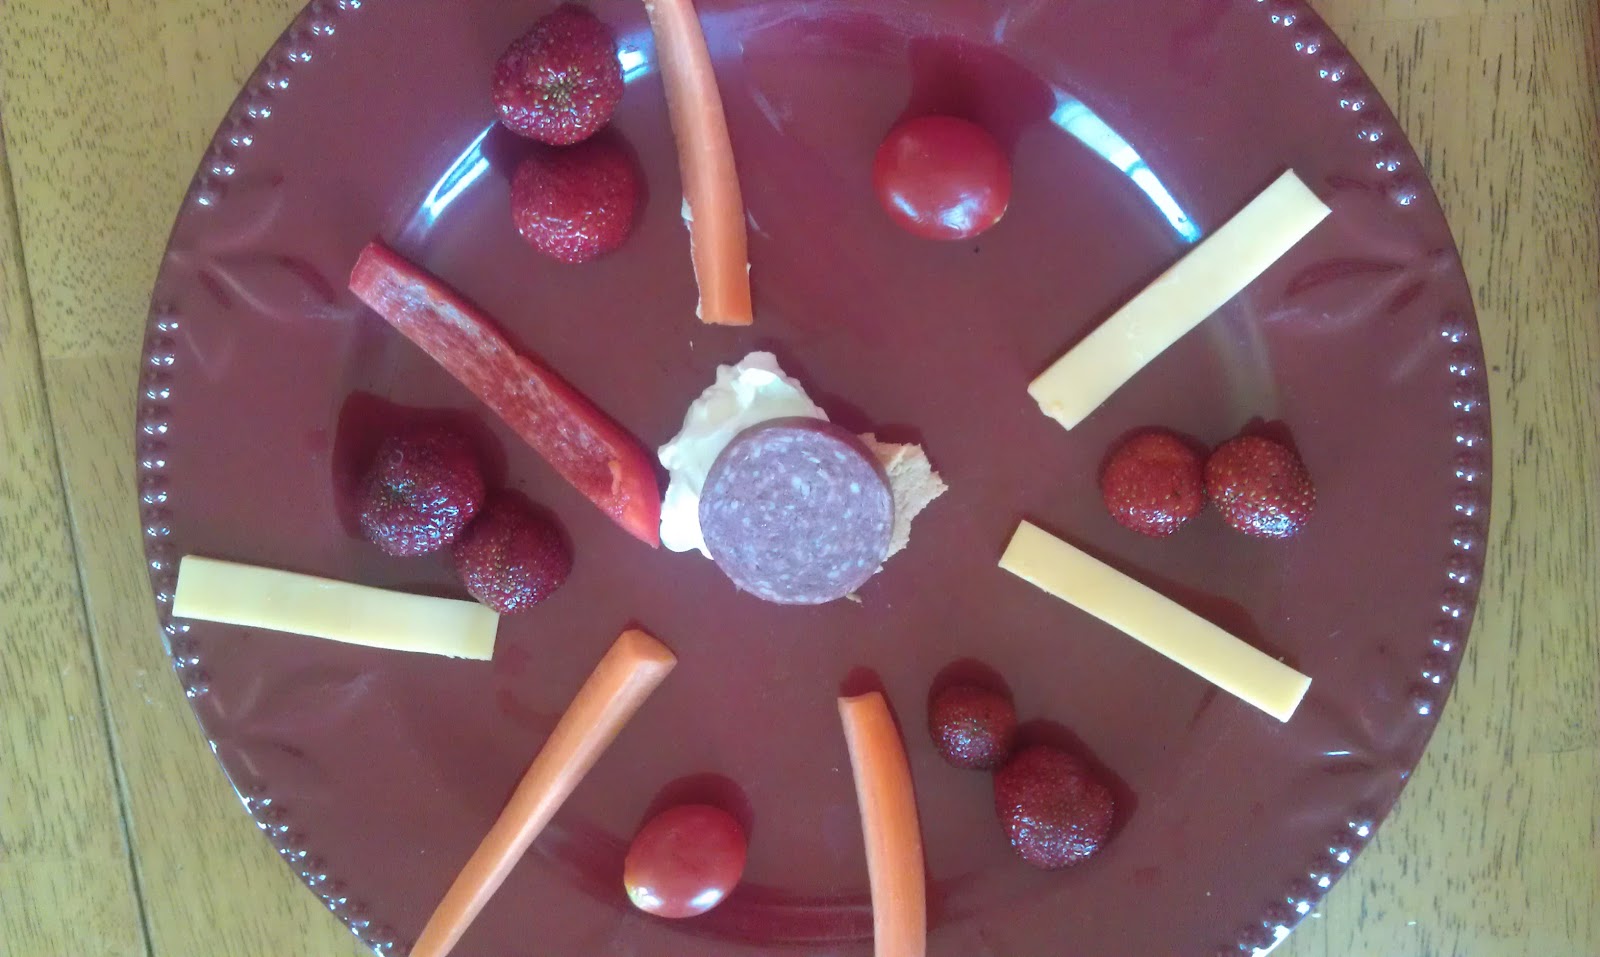
re-inventing lunch: dip flowers

Our lunches had become awfully redundant.   They were fairly nutritious, but very much the same thing, over and over and over.  Sandwiches.  Some kind of fruit (usually seasonal).  Cheese sticks.  Kombucha.  And the next day, it would be the same thing.

I'm ashamed to say, the sandwiches were almost always the same: almond butter.

Now don't get me wrong, this is a perfectly nice lunch.  But every single day?  Bor-ing.  To credit my kids, they never really complained.  But I had a feeling they were losing interest.  We desperately needed to perk up our daily lunch fare.


A few weeks ago, I came across the idea of serving Hummus Flowers.  Frankly, I think it's pure genius.  Except that I knew my crew wouldn't buy into the hummus thing.  I love hummus.  My husband loves hummus.  Our oldest likes it alright, and our daughter adores it.  But the middle boys?  Forget about it.


So here's what we do.  I set out an assortment of vegetables, cheesesticks, fruits, and crackers.  Pretty much what we have on hand, with a heavy emphasis on vegetable choices.  (Summertime will help so much with this!)  Then I set out an assortment of "dips."  We've tried cultured sour cream, almond butter, kefir cheese, kefir cheese ranch dip, homemade ketchup, mayonnaise, and of course hummus.  


The dip (or dips, I'm perfectly fine with triple-centered flowers, for example) goes in the center of the plate, and around it, you build a flower.  It's as simple as that.  Be creative, or be boring.  It's up to you.

Of course, you don't have to dip everything into the, well, dip.  Personally, I'm not keen on the idea of strawberries and hummus, for example.


Let me tell you...this has been so fun!  The boys all really get into building their flower, and this week...this week, I saw a sight I never imagined I would see.  My 6-year-old actually ate broccoli.  Write it down, people.


I've so enjoyed watching my pickiest eaters getting excited about vegetables.  And while I suppose this should be considered Playing With His Food, I had to smile when my sons today constructed bridges, volcanoes with lava, and of course, broccoli trees.  

And they ate everything they served themselves.

Truly amazing.

So there it is: lunch, re-invented.  Call it art, call it sculpture, call it play.  I call it fun, different, and nourishing.  And that's more than good enough for me.

Sunday, March 27, 2011

exploring grain-free recipes

Recently I mentioned that my husband and I are revisiting the Maker's Diet. (Phase 3 begins this coming week!) One of the big things about the first four weeks is that there are no grains allowed. None, not even properly soaked or sprouted ones. No wheat, no rice, no millet, no quinoa. It's a pretty big change from the way we normally eat.

Early on, I was inspired to seek out alternative recipes. I'm thankful to say that I was able to find many grain-free recipes among the community of real food bloggers.


Almond Flour

These crackers are a recipe I originally found for Elise. Grains are super hard on the digestive system of young children, and I am attempting to keep my baby away from grains as much as possible for the next year or so. I do let her have them sometimes (properly prepared), but for the most part I'm steering clear.

At any rate, these Vegan Herb Crackers ended up being an amazingly delicious find. Jeff, Elise,and I love them! They're made with almond flour (which you can make at home for a fraction of what it costs buy the product ready-made). They're so simple to make, too - assuming you have parchment paper handy.


Coconut Flour

Another flour I've been experimenting with is coconut flour. High in protein, high in fiber, and low in carbohydrates, it seemed to make perfect sense. Coconut is extremely nutritious, besides the nutritional benefits to coconut flour, these recipes only call for a small amount. A little of it goes quite a long way. Thus, it's more frugal than it may seem at first.

We've been loving Coconut Flour Pancakes in the morning. Smeared with butter and almond butter, they are delectable! There's no need to plan ahead and soak the flour. And one recipe uses three eggs, so they are nutrient-dense.

Another great recipe is for Coconut Flour Bread. It's delicious as a simple addition to dinner, or toasted to go alongside eggs at breakfast. It is a shallow, dense bread which doesn't lend itself to sandwiches, but it works very nicely with a beautiful pat of butter.


Going Grain-Free

I'm so thankful to have found these recipes as we make our way through the six weeks of the Maker's Diet. Jeff and I even enjoyed sausage pizza last week, thanks to an almond flour crust recipe. I don't intend to stay away from grains indefinitely, but going grain-free for a few weeks has certainly been eye-opening. I've so much enjoyed playing with the recipes, and it's nice to have options of things I can make for my little girl.

So while I don't intend to avoid grains forever, I do plan to continue seeking a variety of nutrient-rich recipes. It's fun, it's healthy, and my waistline appreciates the low-carb lifestyle!

Monday, February 14, 2011

easy chocolate fondue


Whether for Valentine's Day, or any time you choose to honor someone you love, here's an easy, simple, and romantic treat. It's adapted from "175 Natural Sugar Desserts" by Angelina and Ari Dayan. Served cold, it only takes a few ingredients, and I'd venture to guess they're probably ones that you already have on hand. So easy, and simply sweet!


Chocolate Fondue
1/2 c. cocoa powder
1/2 c. whole milk
2 t. raw honey

Using a small saucepan, combine the cocoa and the milk. On low heat, stir until well-combined and smooth. Stir in honey. If desired, add milk to thin the sauce to your liking (but keep in mind it will thicken when cool). Pour into small serving dishes, and put in the refrigerator for an hour to thicken.

Serve with fresh fruit, cookies, or other dipper of your choice. Enjoy!

Thursday, January 13, 2011

potato cheese soup

This recipe is based on my mama's Golden Cream Soup. It's something I grew up eating - and it was one of my favorite meals. Now, I've adapted it a bit, and it's something I love serving my own family. I do double my mom's recipe, because a single batch barely gets us through dinner, and this soup is just as awesome the next day. It really hits the spot on chilly winter nights.


Potato Cheese Soup
6 cups peeled, chopped potatoes
3 quarts chicken stock
1 cup peeled, chopped carrots
1 cup chopped celery
1/2 cup chopped onions
2 T. parsley flakes
1 t. sea salt
2 dashes pepper
3 cups milk
2 T. flour
4 cups shredded cheese

In a large saucepan, combine potatoes, stock, vegetables, parsley, and seasonings. Mix well, cover and simmer 15-20 minutes or until the vegetables are all tender.

In a separate container (a good idea is a tight-fitting lidded container), gradually add milk to the flour, mixing well. Once this mixture is combined, add it to the pan. Cook til thickened, 10-15 minutes.

Add cheese. Stir til melted. Serve and enjoy!

Friday, December 17, 2010

scrumptious peanut clusters


Last week I pieced together something which turned out to be the best experiment I've had in a long time. The chocolate-covered candy I made last year was good, but it seemed to be missing some vital element. Therefore, I went digging...and determined that the lacking note was a little thing called butterscotch.

I preferred to not use packaged butterscotch chips, so I poked around some more, and came up with a recipe for butterscotch sauce. It called for brown sugar, butter, heavy cream, vanilla, and salt. I've found that Rapadura and Sucanat are excellent substitutes for brown sugar, so I decided to go for it. I used Sucanat which I had powdered for a few minutes in my food processor.

The butterscotch sauce turned out beautifully! As for the chocolate, I followed Kimi's recipe for a wonderful honey-sweetened, dark chocolate coating. As soon as the chocolate was ready, I mixed in my butterscotch sauce. I then stirred in the peanuts, and dropped them in clusters onto waxed paper, and chill. So easy!

And so delicious. They turned out far better than I ever imagined. Now, the only challenge will be making them last until our guests arrive next week!

I didn't measure all the amounts, but this is approximately what I used:

10 oz chocolate sauce
8-10 oz butterscotch sauce
3 cups peanuts

I will absolutely be making these again. Definitely homemade Christmas candy at its best!

Thursday, August 12, 2010

my first pickles!

I recently made my first attempt at pickles! Granted, this probably isn't too earth-shattering as far as news goes, but it was exciting for me. And since this is my blog, I thought I'd share.


So, I found a great recipe for bread and butter pickles in "Eat Fat, Lose Fat" by Dr. Mary Enig and Sally Fallon (the authors of "Nourishing Traditions"). It's a recipe which uses lacto-fermentation, which thrilled me to no end. Lacto-fermentation is a traditional method of preserving food. It uses lactic acid. The end result is amazingly healthful and nourishing...we're talking better digestion, good bacteria, increased levels of vitamins.


The method I followed for these pickles was so simple. Basically, it calls for throwing together the following: sliced pickling cucumbers, onions, honey (or maple syrup) yellow mustard seed, celery seed, turmeric, salt, and whey. The whey is the key for lacto-fermentation. Cover with liquid, cover tightly, and leave at room temperature for two days. So simple.


The verdict? We really enjoy them! Especially my oldest son, who has never met a pickle he didn't adore.

Next time I plan to slice the cukes a bit more thinly (I got carried away with my super capable new food processor), and go a little lighter on the celery seed. But I definitely think we've found a keeper.

It's so much fun to learn how to make things the traditional way!

Saturday, June 12, 2010

thousand island salad dressing


My favorite salad dressing is Thousand Island. It has been for years. In my Fat-Free Days, I made my own regularly: unfortunately, it called for white sugar, commercial mayonnaise and several other ingredients which I consider undesirable these days. After my food conversion, I feared that Thousand Island and I may have parted ways forever.

But a while back, I decided to try a recipe conversion using real food ingredients. It's costly in terms of my supplies, and it does contain a sweetener (however natural), so I only make it every so often. At my house, the basic salad dressing is this delicious vinaigrette from The Nourishing Gourmet. But for those times when I want a little indulgence, I am glad to have this do-over of my old favorite.


Thousand Island Salad Dressing

1/4 cup hot water
2 T. Rapadura or Sucanat
1/4 t. sea salt

1 c. sugar-free mayonnaise (I supplement with sour cream if I'm low on mayo)
1/4 c. sugar-free ketchup
2 T. white vinegar
2 t. minced onion OR 1/4 t. onion powder
2 dashes black pepper

Dissolve Rapadura and salt in hot water. Add the remaining ingredients, stirring well to combine. Cover and refrigerate to blend.

Enjoy!

Monday, April 12, 2010

buttery cinnamon rolls


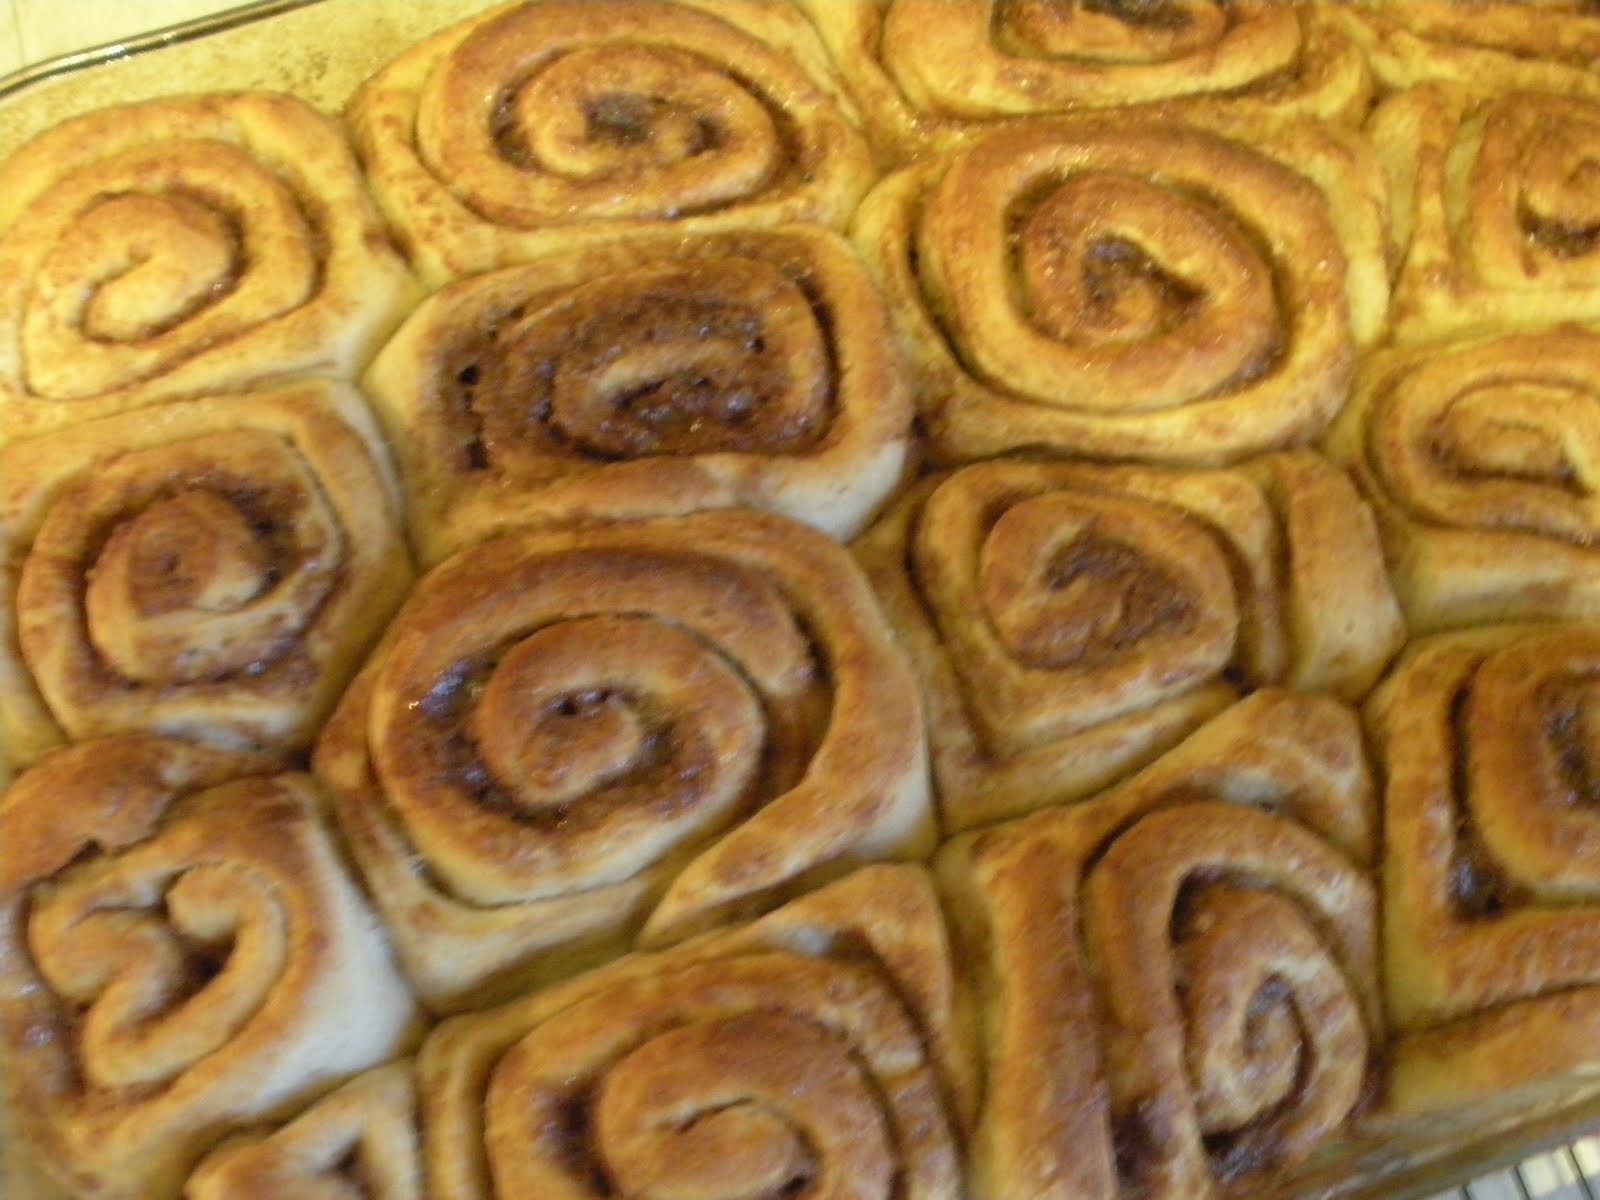
For, the past few months I've been trying to perfect my method of making cinnamon rolls. I'm really happy with the last couple of batches, and since I've had a request, I thought I'd share.

Dough:
For the dough itself, I use this Organic Soaked Homemade Bread recipe from Kelly the Kitchen Kop. I make the 3-loaf recipe, and use 2/3 of it for baking sandwich bread, reserving 1/3 of the dough for a pan of cinnamon rolls.

Once the dough is finished kneading, (and I've got the bread rising in the appropriate pans), I roll out the last portion of it for the cinnamon rolls.

Rolls:
1 stick butter, melted
1/4 c. Rapadura or Sucanat
2 t. cinnamon

Use a well-floured countertop, rolling the dough out to 1/4 to 1/2-inch thick. Try to make it a rectangle in shape. Then brush the dough with melted butter, and wait a few minutes to let the butter cool. (I've found that if I work too quickly, the melted butter will squeeze out when the dough is rolled up.) Sprinkle evenly with a cinnamon/sugar mixture.

Then, carefully roll the dough, starting with the longest side. Using a knife, cut rolls off 1/2 to 3/4 inch thick. Place in a buttered 9x13 pan, leaving a little space for them to rise. You may brush the tops with any remaining melted butter, for extra yumminess.

Let rise approximately 2 hours, or til nearly doubled in size.

Bake at 350* F for 15-20 minutes. Remove from oven and allow to cool...as long as you can resist, that is!

(If you enjoy frosting on your cinnamon rolls, I recommend this Basic Vanilla Frosting recipe from Wardeh at GNOWGLINS.)

Friday, December 11, 2009

healthy peanut brittle

Yes, Virginia, there is a healthy way to make peanut brittle!

It's not all about the candy
. But very same week that I posted my plea for a corn syrup-free peanut brittle recipe, one of my favorite bloggers answered my cries. Not that I have any reason to think that she reads my blog. In fact, I'd be surprised to hear that she does. Nevertheless, the timely answer thrilled me down to my toes.

Ultimately unable to wait for my weekend grocery shopping trip, I ventured out yesterday and bought some more peanuts. I was dying to try this recipe. And this morning, I did.


It takes a bit of time (you must stay at the stove to stir constantly), as candy-making often does, but it was quite easy. And best of all, it has a stellar list of ingredients. Not so much as a drop of corn syrup, refined sugar, or other unsavory stuff. I am tickled pink, I tell you.


And I assure you, it's been a big hit around here today. I love it, and my boys are wild for it. In fact, Kyle told me that he likes this peanut brittle "better than Halloween candy." Score one for this beaming mama!


To view the recipe in all its glory, head over to Passionate Homemaking by clicking HERE.

Friday, April 24, 2009

homemade "pop tarts"

My boys love pop tarts. And frankly, I refuse to buy them anymore. So I was thrilled when I found a recipe for homemade pop tarts online at Chez Pim. It's genius! Why didn't I think of this? (Well, I guess it could be that I'm not a genius....)


First you take a piece of pie crust dough, shape it into a rectangular shape, and roll it out...

I like to trim the edges a bit, although I couldn't cut a straight line if my life depended on it. Then I transfer to a baking sheet & spread on some jam. I like to use 100% fruit spread; this is blackberry. Mmm!

...Fold it in half & crimp the edges with a fork. I had a little 3-year-old help with this project.

Brush it with an egg wash and cut some vents in the top...

Bake... And voila! Homemade, refined-sugar-free* pop tarts.**

No, the jam on the bottom was not intentional. We had a little over-stuffing problem (more child "labor") and there was a jam issue. But still, delicious! My kids were thrilled, and I am too.


*I used a pie crust recipe which called for flour, butter, salt, and a pinch of stevia. It's also my preference to use a 100% fruit spread instead of sugar-sweetened jam.

**These are obviously not traditional "pop tarts" in the sense that they would go in the toaster and pop out again. But a toaster oven would be lovely. And frankly, we've never toasted pop tarts in our house, we like 'em straight out of the box...